Plugins
Plugins are a wonderful feature that ROBLOX has added. They can allow you to do so many things easily. If you are wondering how to install plugins, then you have come to the right place.
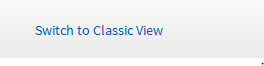
First, you must have ROBLOX Studio downloaded. If you are not sure if you have it downloaded, go to the develop tab at the top of the ROBLOX website. Edit one of your games, if it asks you to install ROBLOX Studio, then install it. If your game pops up and it doesn’t ask you to install anything, then ROBLOX Studio is installed. Once you have Studio installed, pull it up. There should be a shortcut for it on your desktop. If not, go to your start menu (on windows 8 put your mouse up to the top corner area of your screen) and type in ROBLOX Studio in the search bar that shows up. After opening ROBLOX Studio, click on “Switch to Classic View” near the top. It looks like this:
Once you have done this, you should see a tab that has “Library” on it near the top of the page. It looks like this:

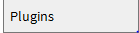
Click on that, and a new page should show up. Look at the sidebar on the left side of your screen, you should see a button that says “Plugins.” If you can’t find it, it looks like this:
When you have clicked on that, you should see a list of plugins show up. Now you can click on any plugin that you find interesting and learn about them. To install them, just press the install button that shows up on the right side of your screen when you click on a plugin.
To use your plugins, go to the develop page and edit one of your games. After the game has shown up, click on the “Plugins” tab at the top of the page. When you have done this, a list of your plugins and their features should show up. Click on one of them and you should be able to use the plugin.
I hope you enjoyed this post. Have fun with your new found knowledge!
